
If you use a semi-automatic pistol for defense, it must be absolutely reliable. In a defensive situation, any malfunction could have disastrous consequences. The first way to ensure that your pistol is reliable is to purchase a quality weapon. However, even the best guns can suffer from reliability issues if they aren’t properly maintained. You must know how to properly clean a semi-automatic pistol if you are going to trust it with your life.
Below is how I clean my handguns. I have found this method to make my pistols almost 100% reliable. There is always a chance that a mechanical device like a gun will fail. However, cleaning a pistol in this way will help you eliminate a lot of variables that commonly contribute to malfunctions. At the end of the article, I have provided instructions on how to clean pistol magazines as well.
What You Need to Clean a Semi-Automatic Pistol
- A well-lit area
- Good ventilation (Gun cleaning chemicals can cause health problems if inhaled, so good ventilation is a must)
- Pistol-sized cleaning rod
- Caliber-specific bronze bore brush
- Patch loop or jag
- Nitrile gloves
- A small brush
- Cleaning Patches
- Q-tips (also referred to as swabs)
- Solvent (to remove lead and copper fouling)
- Gun oil (to lubricate the gun after cleaning)
For a complete rundown of the equipment will need to keep your guns clean, click here to see my article Essential Gun Cleaning Tools.
Make Sure the Pistol Is Unloaded
The first step to cleaning a semi-automatic pistol is to make sure it is unloaded. To do this, eject the magazine from the firearm and put it away. I like to shut mine up in a tool chest to make sure it doesn’t figure out a way into the gun during the cleaning process.
After you eject the magazine, pull the slide back and lock it in place. This should remove any round that was in the chamber. Locking the slide back will allow you to inspect the mag well and chamber to ensure there aren’t any rounds in the gun.
Related: Best Handguns for Preppers
Remove the Slide Assembly
 After you ensure that the pistol is unloaded, remove the slide assembly from the frame. Every pistol has a slightly different way to do this. The best way to familiarize yourself with your firearm’s disassembly procedures is to read through the manufacturer’s manual. If you didn’t get one with your gun, they are easy to find online.
Below are slide removal instructions for common types of defensive handguns. If your firearm isn’t listed below, Youtube will probably have a video that you can use.
Glock Pistols
All Glock pistols feature a similar design, so the method for removing the slide from the frame will be the same for all of them. Here are the steps:
- Triple check that the gun is unloaded.
- Rack the slide all the way back and let it come back forward.
- Pull the trigger.
- Next, pull the slide about half an inch to an inch back.
- Pull down on the slide lock. This is on the frame above the trigger.
- Gently allow the slide to go forward.
- Pull the slide off the front of the frame.
*Note: This disassembly method will work for similar pistols as well, such as the Smith and Wesson Sigma and the CZ-P10.
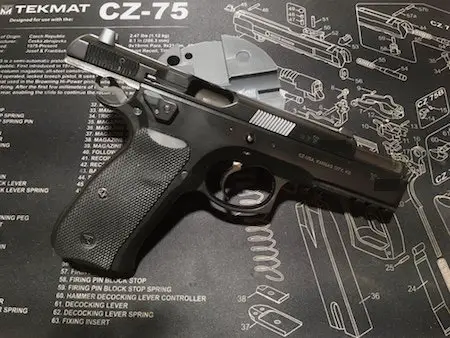
CZ-75 Pistols
This method should work for any CZ-75 handgun, including full-size models and compacts.
- Triple check to ensure the gun is unloaded.
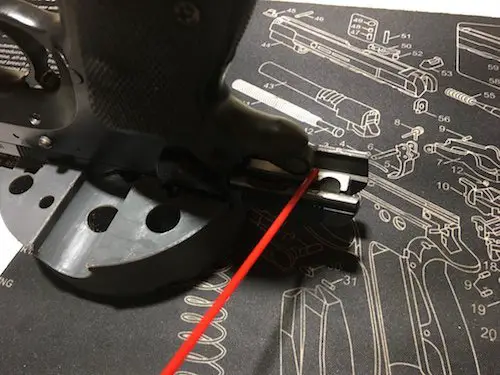
- Pull the slide back slightly, aligning the vertical lines on the slide and frame.
- Hint: I have found that if you lower the hammer to the “half cock” position, the hammer will cause the slide to stop in exactly the right position for the marks to be lined up.
- Push out and remove the slide stop. (Some models such as the P-01 will require you to use a punch to remove the slide stop)
- Pull the slide off the front of the frame.
1911’s
- Triple check to ensure the gun is unloaded.
- Activate the thumb safety.
- Use a bushing wrench to rotate the barrel bushing slightly. You want the edge of the bushing to still make contact with the recoil spring plug.
- Do not rotate the bushing too far. Doing so will cause the recoil spring plug to launch out of the gun. It could cause severe injury, especially if it hits you in the eye.
- Remove the recoil spring plug. To do this, push down on it slightly, and rotate the barrel bushing out of the way. Gently allow the recoil spring plug to come back up.
- Be very careful when removing the recoil spring plug. It is under a lot of spring pressure.
- Pull the slide back about halfway. You want the slide stop to catch in the slide’s takedown notch. This is the smaller notch behind the slide catch.
- Push the slide stop out.
- Pull the slide off the front of the frame.
Smith and Wesson M&P
- Triple check to ensure the gun is unloaded.
- Pull the slide back and lock it using the slide lock.
- Rotate the takedown lever to the down position.
- Pull the slide back and let to go forward
- Next, pull the trigger. The slide will jump forward, so be careful to not let it fly off the gun and get damaged.
- Pull the slide off the front of the frame.
Remove and Clean the Barrel

After you remove the slide assembly from the pistol’s frame, start cleaning the barrel. Wipe the outside of the barrel down, being sure to pay attention to any locking lugs that may be present.
I have found the process to be a little less messy if you use a clean patch or rag to remove any existing oil or grease before using solvent. Doing this also allows the solvent to work on the more stubborn residue, which is what the solvent is for anyway.
As your patch becomes dirty from use, throw it away and get a new one. This will help ensure that any gunk or grime you remove stays gone.
When cleaning the bore, I like to scrub it with a bronze brush to break up the residue inside of it. I will then push a solvent-soaked patch through the bore to begin dissolving copper and lead fouling. Scrubbing the inside of the bore before using solvent breaks up the fouling a little, giving the solvent more surface area to attack.
Let the solvent sit in the bore while you are cleaning other parts of the firearm. Be sure to follow the instructions that come with your solvent. Some solvents should not be left inside the bore for too long. Also, certain finishes are sensitive to some solvents.
*Note: When using a cleaning rod, using a rod guide is always a good idea. It will help keep the rod from hitting the barrel’s crown. Damaging the barrel’s crown will reduce its accuracy.
Clean the Slide Rails

The next thing you need to do is clean the slide rails. Be sure that you clean the channels on the slide as well as the corresponding channels on the firearm’s frame.
One of the best ways that I have found to clean the inside of a pistol’s slide rails involves the use of an old gift card. I fold a solvent-soaked patch over the edge of the gift card and use it to wipe out the inside of the slide rails. You can bend the gift card to get to hard to reach places.
Another way to clean a pistol’s slide rails is with a Q-Tip. If your Q-Tip won’t fit in the slide rails, squish the tip with a pair of pliers. This will allow you to get more of the swab inside the slide rails, allowing to you clean them easier.
Clean the Breech Face and Locking Lug Recesses

The next step to clean a semi-automatic pistol is to clean the breech face. The breech face is where the base of the cartridge rests inside of the slide when it is chambered. It is also where the firing pin strikes the cartridge’s primer.
I use a Q-Tip soaked in solvent to clean this area. I try to clean as many nooks and crannies as possible. When using Q-tips, just be sure that you don’t leave behind any fuzzies. Also, avoid getting solvent and other chemicals into the firing pin channel.
If your pistol has locking lugs, like a Browning Hi-Power or CZ-75, clean the locking lug recesses while you are cleaning the breech face. If you allow residue to dry up and build inside of the locking lugs recesses, it can cause malfunctions.
After you clean these areas, be sure to wipe away any remaining solvent with a clean patch.
Clean Around the Extractor

The next step to clean a semi-automatic pistol is to clean the extractor, which is one of the most important parts of a semi-automatic pistol. Unfortunately, it is also one of the most neglected parts. Although you shouldn’t saturate this area with cleaners or solvents, you should make an attempt to remove some of the fouling in and around it.
You can use brushes or an air compressor to remove at least some of the fouling that is present. One thing I do differently is that I use a notecard to clean the gaps between the extractor and frame as well as underneath the extractor claw. To do this, gently insert the edge of the notecard between the extractor and the slide. Do not force it. Gently pull it back out. Doing this will absorb a little of the crud that is present. Just be careful that you don’t tear the notecard and leave a part of it in the extractor channel. Depending on how the extractor fits in the slide, this may not be possible with some pistols.
If using an air compressor to clean around the extractor, install an air spray nozzle on your compressor hose. Then, squirt air into the channel, pointing it towards the front of the slide. Pointing it to the rear of the slide will only blow the debris further into the frame where the extractor sits.
Clean the Rest of the Slide
After you clean the breech face, the extractor, and any locking lugs, now start cleaning the rest of the pistol’s slide. Use brushes, Q-tips, and patches to remove residue from any surface you can get to. After you have done an initial wipedown, use solvent-soaked patches and swabs to remove any fouling the first pass missed. Use a clean patch to remove any remaining solvent.
*Note: If you have a new Glock pistol, do not remove the gold-colored stuff that is on your frame. This is a burnishing compound that helps the gun break-in.
Clean the Rest of the Frame

The next step to clean a semi-automatic pistol is to clean the frame. Wipe off the ejector and use Q-tips to reach any hard-to-get-to spots. Like with the slide, use a solvent-soaked patch to clean the inside of the frame after you do an initial wipedown.
Take a clean patch and wipe out the inside of the magazine well. This will allow your magazines to slide in and out of the pistol freely. As with the slide, use a clean patch to wipe away any solvent that remains.
Clean Any Other Parts
After you have cleaned the slide and frame assemblies, be sure to wipe down smaller parts that you removed during the disassembly process. These include recoil springs, recoil spring guide rods, and slide stops for firearms that use them. Wipe off any residue on their surfaces as well as any residue build-up in any nook or cranny.
Finish Cleaning the Barrel

While you have been cleaning other parts of your gun, the solvent that you put in the bore has been dissolving lead and copper fouling. Now, take a clean patch and run it down the bore. A jag for your pistol’s caliber is the best tool for this, but if you don’t have one, you can use the patch loop, however it isn’t nearly as effective.
After you run the patch through the bore, it will probably come out with black and blue residue all over it. That is normal and it means that the solvent has been doing its job. Soak another patch and run it through the bore. Follow it with another clean patch.
Continue alternating solvent-soaked patches and dry patches through the bore until a dry patch comes out clean. When this happens, your bore is clean.
After the bore is clean, run an oil-soaked patch through the bore. Follow it with a dry patch afterward. The dry patch will remove excess oil, leaving a thin coat of it inside the bore.
You want to avoid allowing excess oil to sit in a pistol’s barrel. Excessive oil tends to attract and hold onto fuzz, dust, and other debris. Having too much oil in a barrel could also be hazardous when firing the weapon. Since oil cannot compress, firing a bullet through a bunch of oil may cause excessive pressure on the barrel. In extreme cases, this could cause the barrel to expand or bulge.
Reassemble the Pistol
After the pistol is clean of all fouling and residue, it is ready for reassembly. However, before you reassemble the pistol, apply a thin coat of oil to internal parts, such as recoil springs and guide rods. Also, apply a small amount of oil to the slide rails on the frame and the locking lug recesses in the slide.
Place the barrel back into the slide, along with the lightly-oiled recoil spring and guide rod. Then, place the slide back onto the frame. If your pistol has a slide stop, install that next.
Lubricate the Pistol
After you have reassembled the pistol, now it is time to lubricate it. To start, apply a few drops of oil in between the barrel and ejection port. Place one at the top, one at the front, and one at the bottom.

Then, lock the slide back using the slide lock. Apply a ring of oil around the outside of the barrel about 1/4 inch from the end.

Apply some oil to the slide rails.

If your pistol is hammer-fired, add a drop of oil where the bottom of the slide runs across the top of the hammer.
After lubricating these areas, work the slide back and forth five or ten times. This will spread the oil. Then wipe away any excess oil with a clean patch. Use this patch to apply a thin coat of oil to the exterior of the firearm.

How Often Should You Clean a Pistol?
You should clean a pistol under two circumstances. The first is after you have fired it. Anytime that you take the pistol to the range, or shoot a couple of rounds at a critter in the woods, clean it when you get home. This will prevent fouling from building up and drying inside the gun.
The other time that you should clean a pistol is after it has been carried for a while. While carrying a firearm, whether it is concealed or carried openly, dust, fuzz, and other debris can find its way inside the firearm. Although a full cleaning as described above isn’t necessary for this situation, it is a good idea to field strip the gun and wipe away any debris and apply oil if necessary. Be sure to do this any time the firearm comes into contact with rain or other water.
Clean Your Magazines
You can have the best gun in the world and keep it perfectly maintained, but it will still jam if you put junky or dirty magazines inside of it. Because of this, use good magazines and keep them clean. Follow the steps below to clean your pistol magazines.
You don’t need to clean your magazines every time you go to the range. However, it is a good idea to clean them if they become dirty because of being dropped or if they have been carried daily for a month or so. You should also clean your magazines after you purchase them to remove thick packing oil.
Disassemble the Magazine
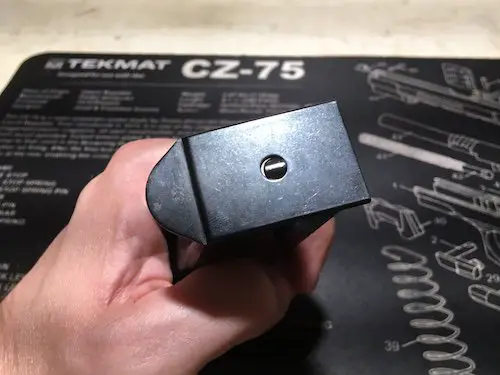
The first step to clean your pistol’s magazine is to take it apart. How to do this will depend on the magazine itself. Some magazines have a different design, but most are disassembled by removing the base plate.
To remove most base plates, use a punch to push in the dimple in the middle of the base plate. Use your thumb to slide the base plate off the bottom of the magazine. While doing this, use your other thumb to cover the magazine insert. This will prevent the spring and insert from flying out of the magazine. Magazine springs are under a lot of spring tension, and you don’t want one to hit you in the eye.
After you have completely removed the base plate, gently lift your thumb that is covering the insert and spring. Allow the spring tension to release slowly. Then, pull the spring out of the magazine and drop the follower out of the magazine body. As you remove the follower and magazine spring, be sure to take note of how each of them fit inside the magazine body.
Clean the Magazine Parts

Wipe the magazine follower, spring, insert, and base plate with a lightly-oiled patch. Then, wipe down the inside and outside of the magazine body. You can use the bore cleaning rod and patch loop to reach places inside the magazine body.
As far as oil goes, you don’t want much at all on the magazine body or on its parts. A very thin, almost imperceptible coat of oil is acceptable. Having too much oil may cause problems with your ammunition and attract crud. You only want enough to help prevent rust.
Reassemble the Magazine
After you have cleaned the magazine’s parts, now put it back together. Start by reinserting the follower into the magazine body. Then slide the spring back into place and compress it by pushing down the insert with your thumb. Slide the base plate back onto the bottom of the magazine body. Use a punch to position the dimple on the insert so that it snaps into place in the base plate.
Conclusion
If you follow the steps listed above, your handgun is much more likely to run well. There are many ways to clean a handgun, some of which are much faster than my method. However, I have found this method to be very effective in ensuring reliability.
If you enjoyed this article, take a look at these also:
CZ P-01 Review
14 Concealed Carry Tips
How to Build a Spare Parts Kit for Your Guns
Best Prepper Guns
The 3 Best Guns for Home Defense
How to Repair a Damaged Gun Screw