
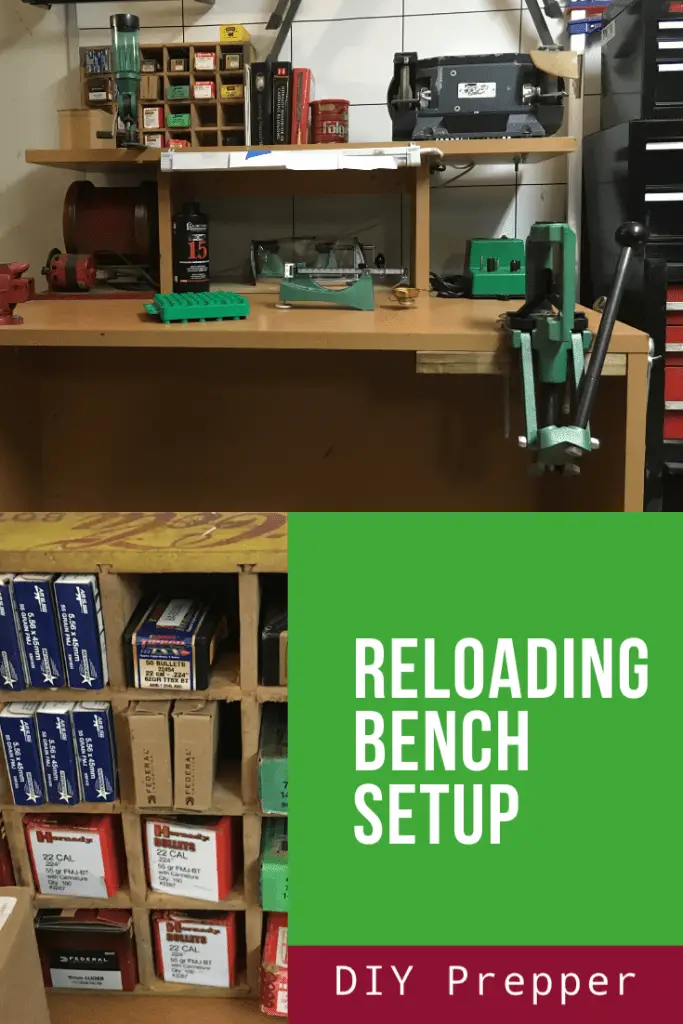
One of the most important parts of reloading is having a well-organized and strong reloading bench. Your reloading bench should be customized for the space you have available and the type of reloading you are doing. Here is how I set up my reloading bench. It works well for single-stage reloading in a small space.
Select Your Bench

A reloading bench should be sturdy and large enough to hold your reloading equipment. Many people like to build their own bench, but mine is actually just an old desk. Although it is made of laminated particleboard, it is really thick and heavy. My favorite thing about it is that it has two levels. This allows me to store equipment on the top level and use the lower level to reload. It is also deep enough that I can store larger equipment, such as my case tumbler and case prep center towards the back of the bench and out of the way.
A good size for a reloading bench is at least 5 feet wide and 3 feet deep. A bench this size will give you plenty of room to store your equipment and components but still have room to work. It will also be large enough to have shelves built into the back of it or underneath it.
Related: Essential Reloading Equipment: Tools for Handloading
It is always a good idea to mount your reloading bench to the wall if you can. A reloading bench can never be too rigid or sturdy. When attaching a bench to a wall, make sure that you drive the screws into a stud. Simply attaching your bench to drywall won’t provide any additional structural strength.
Click here for reloading equipment and components from Brownells.com
If you need to build a reloading bench, 2×4 Basics produces a kit that includes bench legs and shelf links. This allows you to customize it to the length you desire. You can check it out by clicking here.
Mount Your Press
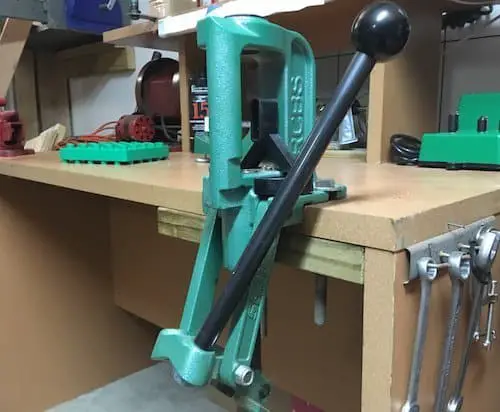
After you get your reloading bench, now you need to set up your press. Where you mount your press will depend on if you are right or left-handed. If you are right-handed, your press should go on the far right side of your bench. Left-handed reloaders should mount their press on the far left side of their bench. Setting up your reloading bench in this way will make reloading easier and more efficient.
Use bolts to permanently attach your press to your reloading bench. To do this, set your press on your workbench and mark where you will need to drill your holes. Use an electric drill to make the holes in the bench. Most presses will require two or three holes, however, be sure to use any mounting holes that your press has.
If your bench isn’t solid wood (like mine made of particleboard), use a backing underneath the bench for added strength. Use the widest bolts and washers that you can find to secure the press to your bench. Attach a nut and washer to the bottom of the bolt and tighten securely.
If you don’t have your press and other reloading tools yet, I highly recommend the RCBS Rock Chucker Supreme Master Reloader Kit. It is what I started with and contains almost everything you will need. You can find it by clicking here.
Related: Best Reloading Presses and Kits
Mount the Powder Measure
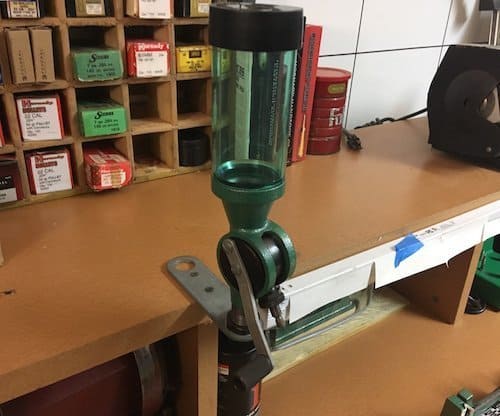
The next thing that you need to do is mount your powder measure. I have mine mounted on the second level of my bench on the opposite side of my press. This gives me plenty of space to use both pieces of equipment. Having the powder measure elevated makes it much easier to use.
When your powder measure is mounted above the surface of your reloading bench, it allows you to keep an eye on your powder level. In addition, having extra height allows you to use drop tubes when dispensing powder. These are basically small funnels that attach to the bottom of your powder measure that allow you to drop powder directly into cases. I also like to use them when dispensing powder into a measuring pan. It is less messy and wastes less powder than trying to dump powder directly into the pan from the measure.
Reloading companies sell stands that raise the powder measure above the surface of a bench. Mounting it on the second level of my bench saved me a little money but still gave me the same functionality.
Keep the Bottom Level Clear
The area next to your reloading press should be kept clear of any obstructions. This gives you plenty of room to do things like weighing charges, lubing cases, and if necessary, using a case trimmer.
Component and Equipment Storage

Your reloading bench needs a place to store components such as bullets, brass, and powder. It should also have places for things such as dies, shell holders, and other equipment. Since my reloading bench is in my garage, I do not store my gunpowder and primers on my bench. I store them in ammo cans inside my home to avoid exposure to humidity and temperature changes.
Your bench should have shelves and other areas to store any equipment you may need. If your bench isn’t large enough to hold everything, tool chests are a good option to hold smaller items like dies and brushes.
For bullet storage, I use an old Coca-Cola bottle rack. The slots are the perfect size to hold standard boxes of reloading bullets. There is also space on the top shelf of my bench for any boxes of bulk bullets and my reloading manuals
Tool Rack

Reloading ammo sometimes requires you to use basic hand tools such as wrenches. I like to keep the ones I need regularly on the side of my reloading bench. For example, if a decapping pin slips inside of a die, I need to use a couple of wrenches to loosen the nut that holds it in place and tighten it after I readjust the pin. Having the necessary tools on my bench prevents me from having to search for them.
Dust Covers

If you have set up your reloading bench in a garage or workshop, you will need to protect your equipment from dust. Dust can cause accuracy issues with precision equipment such as powder scales. It also holds moisture, which can cause your equipment to rust, which is never a good thing.
Since my reloading bench is in my garage, I got dust covers to protect my press, powder scale, powder measure, and case trimmer. Reloading equipment manufacturers produce covers that are specifically designed for their products, like the one pictured. You can also make your own out of a tarp.
Related: Is Reloading In a Garage Okay?
Conclusion
Although there are many ways to set up a reloading bench, what I have detailed above works very well for my needs. If you aren’t sure what you need to get started reloading check out my article, Essential Reloading Equipment. Also, check out my other article, Best Reloading Tools. It goes beyond the basic reloading tools to show you the equipment you can use to speed up your reloading and make it much easier.